Automation Inspection of Over Labeller Machine
The system inspects an area up to 320mm which may contain one, two, four or six labels to indicate.
The labels consist of a base label and an over label. Inspection is required to ensure the presence of the base, over label and also the position of the label with respect to the base.
To cover the 320mm area and maintain a good working resolution, we suggest using two cameras. Each looking at an area of 160mm.
The camera has 640 pixels in X which gives a resolution of four pixels per mm.
The camera controller stores programs in its internal memory that can easily be recalled when setting up a job that has previously been running.
Using varied template programs, we can train your engineers to set up on new label formats, increasing knowledge and overall efficiency.
Integration to your machine
We provide a label fork sensor which will act as a trigger for the vision system. When the sensor detects a label edge it triggers the vision system to perform its inspection.
If the inspection fails, a relay contact opens to stop the machine. An alarm will indicate that the machine has stopped for this fault.
We can also set up other alarms which will warn the operator that the label position is drifting out of tolerance without a full machine stop.
The cameras are sited over the conveyor on a gantry made from aluminium profile. The vision system and its components are housed in a small electrical enclosure to be sited on or under the conveyor.
Use of the system will automatically check for label presence and position, stopping the machine if an error is detected.
This ensures that a 100% checked product reaches your client and frees up the operator to concentrate on other tasks.
We would be happy to conduct a live trial of this system on your machine at a mutually convenient time.
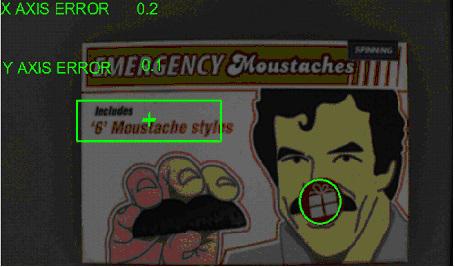
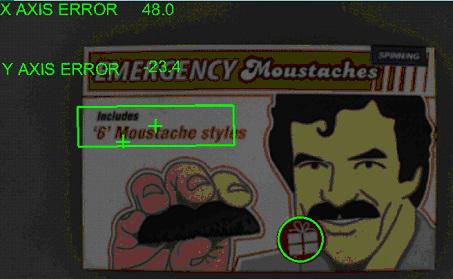
The text in green box is the base label, the green cross is the centre of that pattern. The “gift” sticker to the RHS is the over label. Its centre position has been shifted to be the same co-ordinate as the base label, its green cross is just visible under the base label cross. They are offset from perfect by 0.2 pixels in X and 0.1pixels in Y. The over label has shifted down and left. You can see that the crosses are now offset by a larger amount. A tolerance will be set in X and Y to alarm and or fail. For more information about inspection labeller machine applications, contact More Control on 0345 00 00 400.


